Showing posts with label Finished project. Show all posts

Wednesday, 6 June 2012

Finished Project: Pre-Raphaelite Inspired Choker

I hate throwing out fabric - even the scrappiest of scraps, it just seems so wasteful.  That's how this project came about, it's a fusion of my desire to find a use for leftover strips of fabric and a corset I made a little while ago which I covered in some of the Pre-Raphaelite's paintings -  Pre-Raph Underbust.


This item is available in my Etsy Shop

Thursday, 31 May 2012

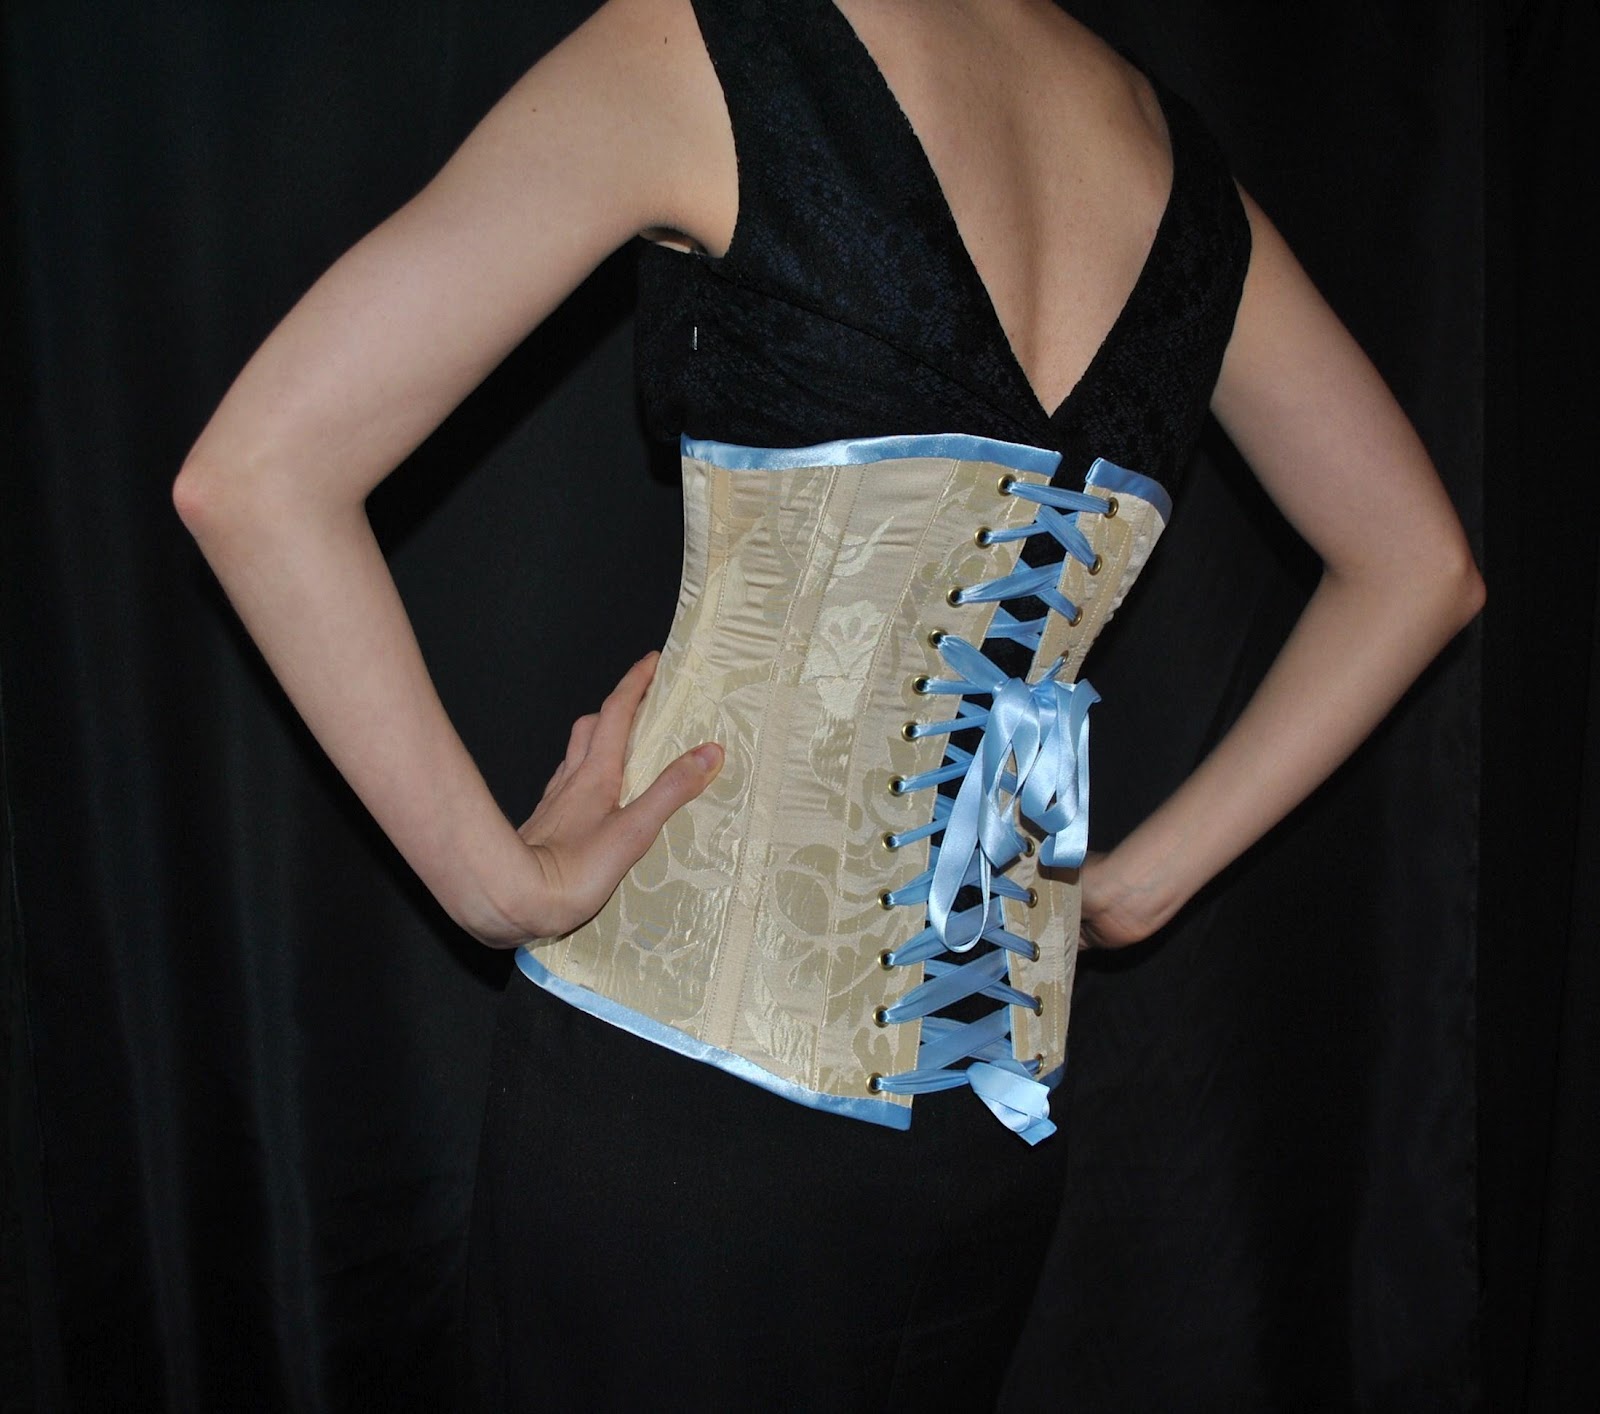
Finished Project: Discordia Underbust Corset

As I continue on my corsetry journey, which has basically been trial and error with a bit of help from books and helpful tidbits from the internet, I think I am now finally getting a really good grip on the pattern cutting aspect of it all.  This corset was another step on the ladder.


It's a long underbust cut to be very flat across the centre front but with lots of defintion on the waist.


 I made this one out of recycled gold furnishing fabric with a pale blue lining, binding and ribbon.  Then I added an extra bow to sit on the front for added prettiness.

Wednesday, 23 May 2012

Finished Project: Dusky Pink Gown

Recently I was invited to a murder mystery evening which was so much fun.  A few weeks before we were given a costume brief and mine was to be a socialite who should wear a full ballgown.  I couldn't find anything in the local charity shops so naturally came to the conclusion that two weeks is plenty of time to design and make a gown from scratch!!!


Luckily I had this fabric in my stash, it's lovely pink chiffon and I used black satin that I had lurking around for the underdress/lining.


I just about got the thing sewn in time and then realised I had just enough fabric left over to make a sash to tie around the waist.  It's funny how last minute ideas like that can really complete a project in a way that surprises you.


These photos were taken the day after the murder mystery, when the British weather decided to behave itself  for once and the blossoms were at their prettiest.  Good timing all round!!

Monday, 14 May 2012

Finished Project: Red Obi Belt

I've been really naughty about blogging this year and I have fallen behind on my posts.  Don't worry though I have given myself a firm telling off and promised I won't do it again.  What this does mean is that I've made lots of lovely things to talk about, starting with this...


I made this belt when I had a sudden urge for a quick sewing project.  I love the labour of a corset but sometimes it's nice to make something that you can whip up in an hour!


I happened to have red habutae silk on hand and it works well enough but I think it would be better in a richer/deeper colour.

Wednesday, 9 May 2012

Finshed Project: Purple and Gold Underbust Corset

Just a quick post about a new corset I made.  I cut it to come down nicely over the hips wtith simple, no fuss panels so I thought I would have some fun with the colours.


The finished corset has a 24" waist.


 As you can see I finshed this one with black ribbon and bias binding.  I'm very happy with this one and I am planning to grade it into different sizes.

Friday, 20 April 2012

Finished Project: Elven Priestess Costume

This was something I made a little while ago.  It started off as just an idea for a gauzy textured, embellished hood which as I developed became a concept for a whole costume.


The further I got with sewing the hood the more it felt like something was missing so I made a matching robe to go with it.  The whole thing is made from pale blue voile, the hood has been embellished with small amounts of other fabrics in shades of blue for example organza, manipulated into floral forms.


Close-up of the hood.


I used triple-flex plastic boning to give it it's shape.  It's perfect for projects like this because it's incredibly lightweight but will still give fantastic support.

Tuesday, 20 March 2012

Finished Project: Alice in Wonderland Underbust Corset

This is a variation on the Pre-Raphaelite corset I made using the same pattern.


I had a lot of fun with this, playing around with the text, trying to create a feeling of whimsy.

Saturday, 25 February 2012

Finished Project: Pink and Silver Butterfly Corset

The most fatal thought when sewing must surely be "the hard parts done, the rest should be plain sailing........".  followed shortly by "D'oh!".  Maybe it's just me but if dare to think that a project is going really well, it's like asking for trouble.

It turns out that sewing delicate filigree wire with fairly delicate silver thread onto the surface of fabric which has steel boning in it is not 'plain sailing'...but I got there in the end.


View of the front-ish.


View of the back-ish.


And a close-up!

Sunday, 8 January 2012

Finished Project: Pre-Raphaelite Inspired Underbust Corset

Ok, so there was a brief, panic-filled moment during construction, when I genuinely believed this corset was going to be a complete failure.  The further I went with it, the worse the weird, plasticy buckling effect got but once I put in on, it behaved itself.


And there was much rejoicing........


I'm completely thrilled at the way this turned out and now I can't stop thinking of all the interesting ways this technique could be used.


I'm wondering whether this could be pulled off a bigger scale....say 18th Century stays! Hmmm............

Saturday, 31 December 2011

Finished Project: Gold and Blue Stays

So I finally finished these stays.  I never did manage to find just the right shade of blue/grey fabric for the bias binding and in the end I just gave in and went with a pale blue, otherwise they may never have been finished.


It doesn't matter how bendy your joints are, or even if you're a direct descendant of Houdini, getting in and out of back lacing stays is just too difficult without help.  So, I really wanted a front lacing pair of stays to be able to put them on myself without needing an assistant. 


I also made the straps front and back lacing for extra prettiness.


I love stay-making, it's so theraputic and satisfying to see them come together, so much to entertain the eye.

Saturday, 5 November 2011

Finished Project: Black Crinkle Hood/Scarf Tutorial

As summer started to fade I decided to make this crinkly scarf to take the chill off.  I used voile but you can use any synthetic fabric to get the same or similar effect. You need to cut out a rectangle of fabric.  I did this by just estimating roughly what would fit nicely over my head and round my neck.


 1) Start off by sewing a rectangle of fabric into a tube and then hem the raw edges.


2) Then gather the fabric together and tie it off tightly as seen above.  It's best to use thread that shows up easily against your chosen fabric.  Keep tying until you end up with a hoop of tightly bound fabric.


3) Now you need to bring a saucepan of water to the boil and plonk your hoop of fabric straight in.  I usually give it a good soak for about a minute.  Carefully remove it from the boiling pan and quickly douse it under cold water.

4)  You will now have a soggy hoop of fabric.  I find the easiest way to deal with it is to sit with a towel on your lap and unpick/cut away all the binding threads, then I use a hairdryer to quickly blast it dry.


And voila you're done! :)

Monday, 24 October 2011

Finished Project: Steampunk Underbust Corset

This is my fourth and final version of this corset and it's also my absolute favourite!  I just love how well it turned out.


I'm not normally one for worrying too much about pattern matching when cutting out fabric but I took the time to align the stripes in an interesting and symmetrical way and it adds so much to the finished piece.  The fabric is recycled from a pair of taupe and cream curtains.  I used some rich brown bias binding that I had in my stash and the chains were from a cheap necklace I picked up at Primark specifically so i could take it apart.

A while ago I started work on another pair of 18th Century stays that ended up languishing in a corner because of bias binding issues but now I'm determined they will haunt me no longer....

Wednesday, 12 October 2011

Finished Project: Green and Gold Embroidered Underbust.

This is another variation on Jill Salens Victorian Underbust constructed from recycled green curtain fabrics lining and all!


After flatlining each panel I machine embroidered up the middle of each panel being careful to avoid sewing too close to the edges - leaving space for the seam allowance and boning channels.  I then fully constructed this corset using cable ties for boning and black satin bias binding to finish the raw edges.


The very last touch to this corset was to sew on the lace applique flowers to each machine embroidered 'stalk'.

Thursday, 15 September 2011

Finished Project: The Aphrodite Gown

I have been a neglectful blogger but I have got lots of sewing done.  The Aphrodite Gown is finished, it was pretty quick to do, the zip was probably the most arduous task. Here is the result!


The original plan was to have red fabric roses decorating the empire line seam but when I finished all the construction it just didn't feel like the right thing to do.


View of the dress from the side/back. I love the effect of the red underdress coming through the white chiffon.


Drapeyness at the back......yummy!

Wednesday, 8 June 2011

Finished project: German Austerity Corset

I have made another corset based on Jill Salen's book 'Corsets: Historical Patterns and Techniques'.  It's the German Austerity Corset, 1917.  Due to wartime shortages this one was designed to use as little fabric as possible, one layer, with the bones inserted into machine fell seams. However I decided to make it up my usual way with three layers.


The corset spread out flat. 

I used recycled curtain fabric, black satin bias binding and 5.5mm width spring steel for the boning.  This was the first time I have used such narrow steel and the jury is still out on it.  Although it was cheaper I think I prefer the shape and support of 13mm steel.


Corset from the front. 

It's an unusual shape,  it comes just up under the bust and comes down over the hips.


I'm not as in love with it as I thought I'd be but it was still fun to make :)

Wednesday, 25 May 2011

Finished project - Poison Ivy hooded cape.

Last halloween I made a Poison Ivy costume for myself to wear to a party and this was the cape that went with it.


It's made from forest green and deep red polycotton.  I wanted to make this as economically as possible as I needed 6 meters of each colour.  


To make the cape a bit more interesting I machine embroidered trailing vines using a satin stitch up the entire length of the garment.  Each panel was decorated separately before joining all the panels together.  Once all the seams were sewn, including the hood, I then embroidered across the seams to ensure the pattern had good continuity across the cape.


I love capes with giant, oversized hoods!!


During the construction of this I thought, hey! this really should be reversible....... you know.......just in case....

Friday, 6 May 2011

The Sirona gown in daylight.

I dragged Claudia out into the garden to take some proper pictures of the finished dress.  Dress forms have got to be one of the most awkward things to maneuver through a house.  Good thing they don't make them with heads or she would have been decapitated on the upstairs banister!!!


I love chiffon - if only it was easier to work with.


A shot of the train.


A close up of the bodice from the side.

Wednesday, 4 May 2011

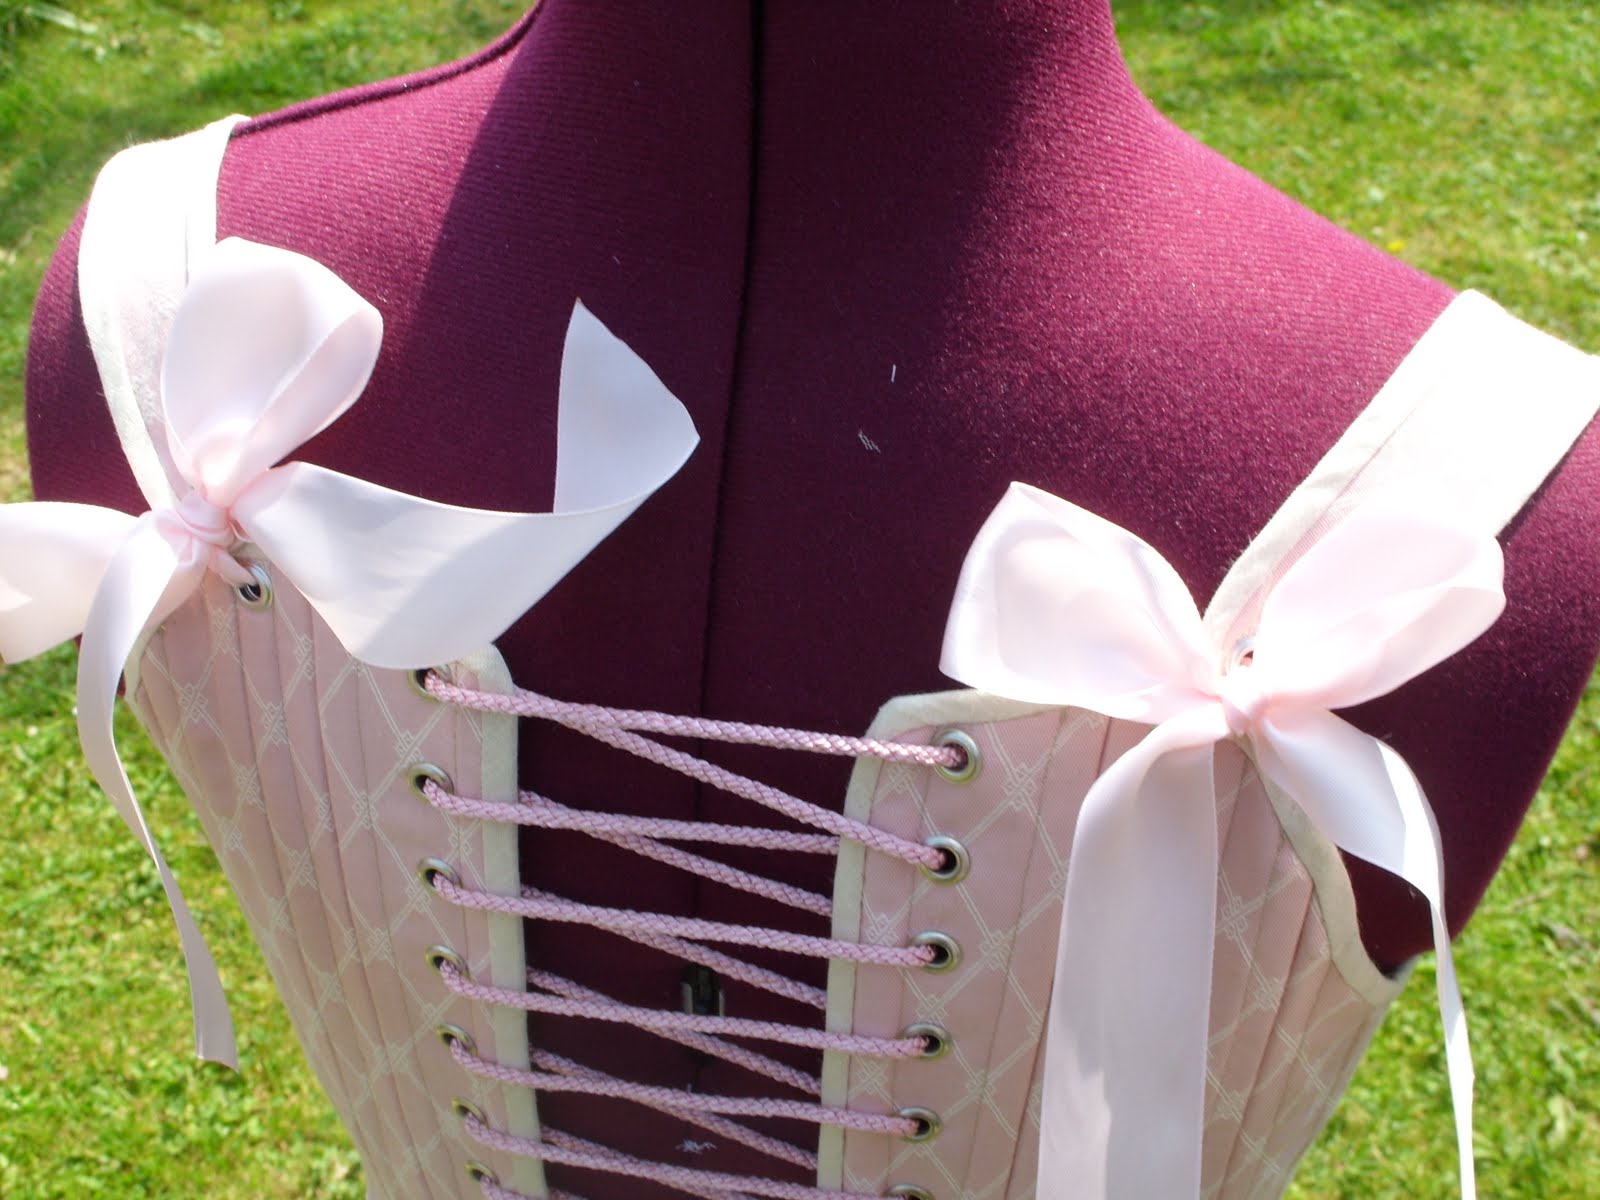
Finished project - pink 18th Century stays.

The stays are all done and poor old Claudia was promptly dragged out into the garden and crammed into them.  Actually, I didn't think she'd fit at all because she is so 'un-squishy' but they laced up really well around her.


 All of the boning channels and seams are sewn by machine, the bias binding to finish off all the raw edges was done by hand.


The stays from the back - I used metal eyelets.


The straps tie together at the back with ribbons throught the eyelets.


These were so fun to make, so much fun in fact that I'm already embarking on another set of stays.  This time I'm going for a richer colour palette with front and back lacing.