As summer started to fade I decided to make this crinkly scarf to take the chill off. I used voile but you can use any synthetic fabric to get the same or similar effect. You need to cut out a rectangle of fabric. I did this by just estimating roughly what would fit nicely over my head and round my neck.
1) Start off by sewing a rectangle of fabric into a tube and then hem the raw edges.
2) Then gather the fabric together and tie it off tightly as seen above. It's best to use thread that shows up easily against your chosen fabric. Keep tying until you end up with a hoop of tightly bound fabric.
3) Now you need to bring a saucepan of water to the boil and plonk your hoop of fabric straight in. I usually give it a good soak for about a minute. Carefully remove it from the boiling pan and quickly douse it under cold water.
4) You will now have a soggy hoop of fabric. I find the easiest way to deal with it is to sit with a towel on your lap and unpick/cut away all the binding threads, then I use a hairdryer to quickly blast it dry.
And voila you're done! :)
Showing posts with label Tutorial. Show all posts
Saturday, 5 November 2011
Sunday, 27 March 2011
Venetian mask making tutorial Part 3.
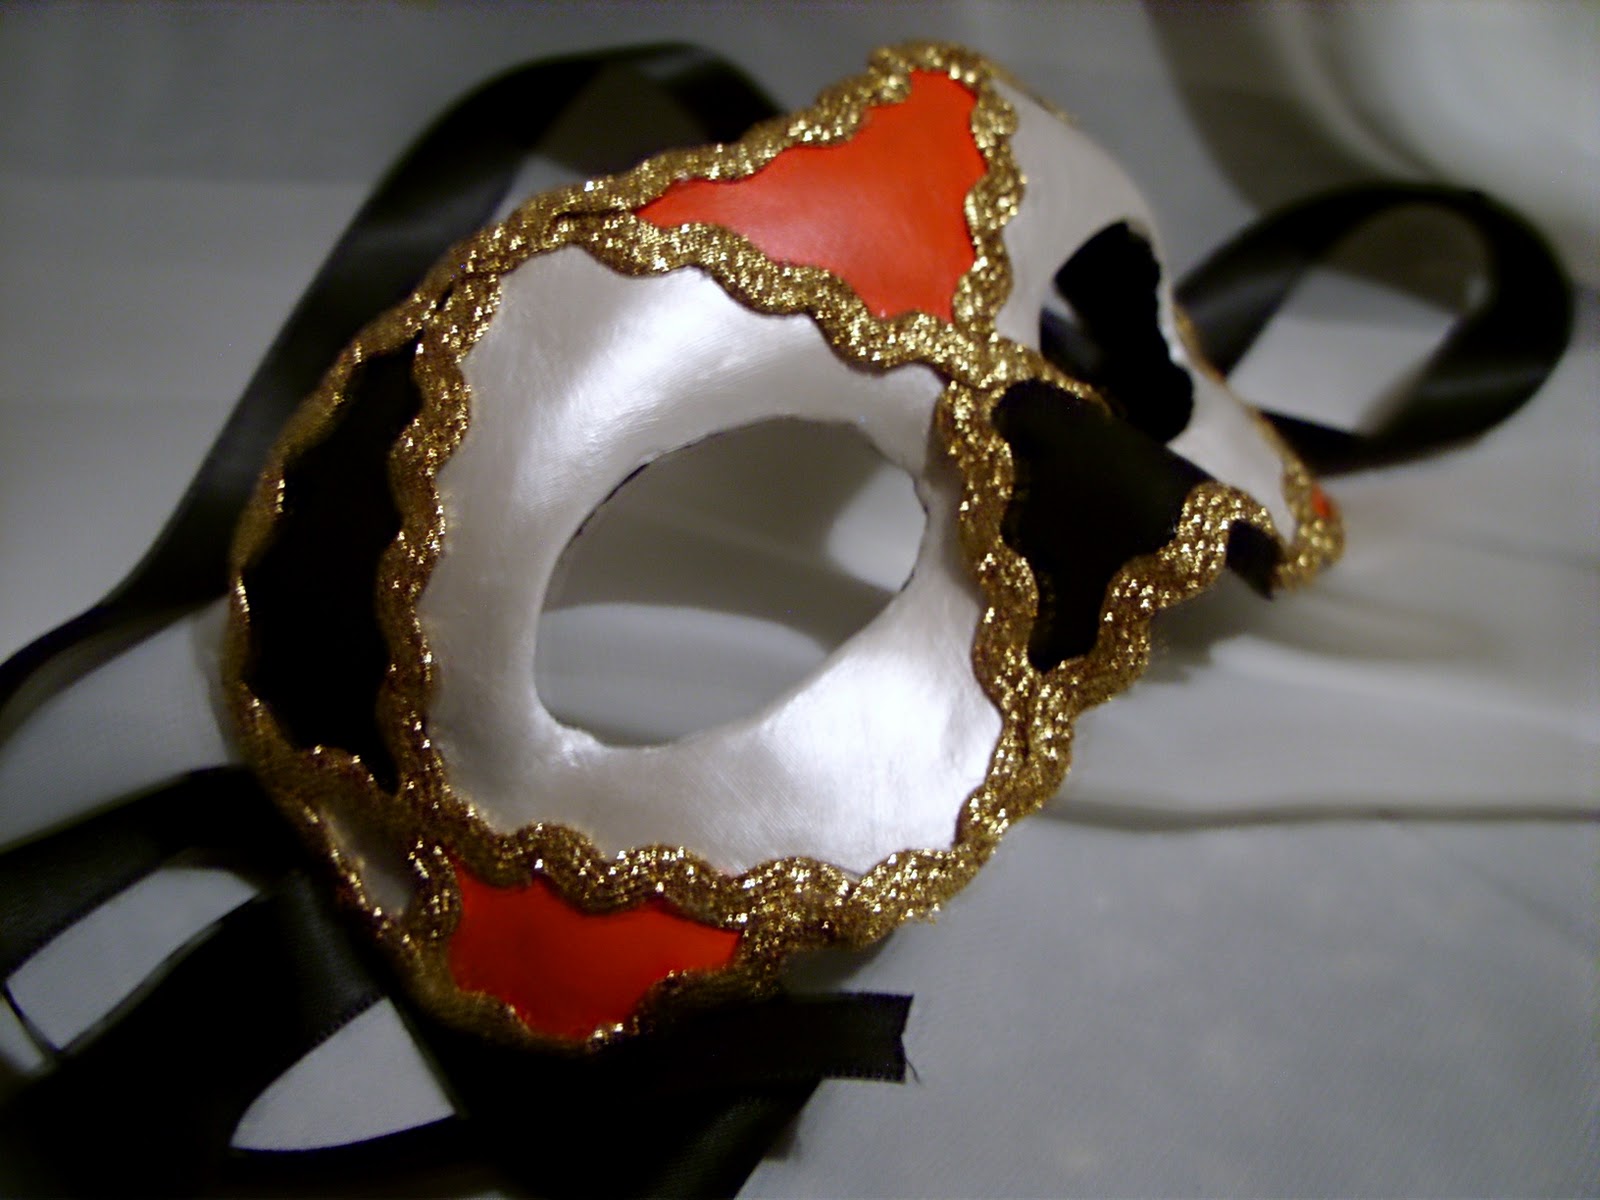
This is the decoration part of the tutorial. I'm going to show you how I achieved the look of my finished mask but you could of course do absolutely anything.
Step 11. Sketch in lightly the lines of the design in pencil. Fear not! If you go wrong you can always erase or repaint it white again.

Criss-cross design pencilled in.
Step 12. Paint the mask in your desired acrylic colours working from palest to darkest. Depending on the colour and quality of the paint you may need more than one coat.
Metallic white paint. I splashed out on this colour but it's so pretty.
Next I painted the red parts.
Finally the black. The black hides a multitude of sins so I painted the inside of the mask with it as well. It helps to hide the uneven surface.
Step 13. Glue gun the braid in place.
Step 11. Sketch in lightly the lines of the design in pencil. Fear not! If you go wrong you can always erase or repaint it white again.
Criss-cross design pencilled in.
Step 12. Paint the mask in your desired acrylic colours working from palest to darkest. Depending on the colour and quality of the paint you may need more than one coat.
Metallic white paint. I splashed out on this colour but it's so pretty.
Next I painted the red parts.
Finally the black. The black hides a multitude of sins so I painted the inside of the mask with it as well. It helps to hide the uneven surface.
Step 13. Glue gun the braid in place.
Glue braid all around the outside of the mask to finish off the design and cover the raw edges.
Step 14. Glue gun ribbons to the underside of the mask and hey presto you are done!!
Finito :)
Labels:
How-to,
Mask,
Mask making,
Tutorial,
Venetian mask
Friday, 25 March 2011
Venetian mask making tutorial! Part 2!
Here's what to do once you have your thoroughly dried and set plaster of paris mask. The next steps are almost as messy so continuing on......
Step 6. Dollop out some of your acryllic repair putty, a little goes a long way. Using a sponge gently apply this to the mask in small sweeping motions, working it onto the surface. The main idea is to fill in the gaps and build up a thin layer onto mask. Some parts may need a bit more filling, for example the bridge of the nose and the slopes down towards the eye holes. At this point it's not going to have a smooth surface. Leave to dry, ideally overnight.
This is what the mask looks like after the putty has been applied and left to dry. As you can see it's hard to get all the lumps, bumps and holes filled in with just one layer of putty so just give it a good overall coating and don't worry too much.
Step 7. This bit requires elbow grease, a piece of course sand paper and quite a bit of patience. Smoothing the surface takes time as you still need to be gentle, if you are too rough the mask will weaken. I found that holding it firmly, directly underneath the part you are sanding, helps to support it and prevent damage.
Step 8. You will get to a stage where many parts of the mask are wonderfully smooth but others are riddled with holes, dimples and rough spots. At this point it's time for some more acryllic putty however I would now advise applying it with a plaster knife or pallette. Target just the holes and divots. You can also use it to sculpt around any wonkey bits - smooth around the eye holes and outside edges. Leave to dry.

I have painted the mask white here, purely to show how I applied the putty in my attempts to achieve ultimate smoothness.
Step 9. More sanding! Use the course sand paper for smoothing off any harsh lumps and switch to fine sand paper to finish off the surface. I found that the fine paper is really good for shaping the eye holes and edges. You can repeat the process of putty and sanding as many times as you need to get a smooth surface.
This photo was taken after three layers of putty and sanding.
Step 10. When you are finally totally satisfied with the surface of the mask it's time to paint it white. Acryllic is best and you want to aim for around three coats. You can lightly sand after the third coat just to remove brush strokes if you like.
Part 3 coming soon.....
Step 6. Dollop out some of your acryllic repair putty, a little goes a long way. Using a sponge gently apply this to the mask in small sweeping motions, working it onto the surface. The main idea is to fill in the gaps and build up a thin layer onto mask. Some parts may need a bit more filling, for example the bridge of the nose and the slopes down towards the eye holes. At this point it's not going to have a smooth surface. Leave to dry, ideally overnight.
This is what the mask looks like after the putty has been applied and left to dry. As you can see it's hard to get all the lumps, bumps and holes filled in with just one layer of putty so just give it a good overall coating and don't worry too much.
Step 7. This bit requires elbow grease, a piece of course sand paper and quite a bit of patience. Smoothing the surface takes time as you still need to be gentle, if you are too rough the mask will weaken. I found that holding it firmly, directly underneath the part you are sanding, helps to support it and prevent damage.
Step 8. You will get to a stage where many parts of the mask are wonderfully smooth but others are riddled with holes, dimples and rough spots. At this point it's time for some more acryllic putty however I would now advise applying it with a plaster knife or pallette. Target just the holes and divots. You can also use it to sculpt around any wonkey bits - smooth around the eye holes and outside edges. Leave to dry.
I have painted the mask white here, purely to show how I applied the putty in my attempts to achieve ultimate smoothness.
Step 9. More sanding! Use the course sand paper for smoothing off any harsh lumps and switch to fine sand paper to finish off the surface. I found that the fine paper is really good for shaping the eye holes and edges. You can repeat the process of putty and sanding as many times as you need to get a smooth surface.
This photo was taken after three layers of putty and sanding.
Step 10. When you are finally totally satisfied with the surface of the mask it's time to paint it white. Acryllic is best and you want to aim for around three coats. You can lightly sand after the third coat just to remove brush strokes if you like.
Part 3 coming soon.....
Labels:
How-to,
Mask making,
Tutorial,
Venetian mask
Tuesday, 22 March 2011
Adventures in Venetian mask making; a tutorial - Part 1.
A couple of weeks ago whilst exploring the internet I came across some images of venetian masks and I thought wouldn't it be fun to make one?! After a fair bit of research I'd found that there are several ways of going about this, the traditional way being paper mache, but I'm going with a plaster of paris base.
The finished mask.
First you need to design your mask or at least have some rough idea of what its going to look like. The major decision is symmetrical or asymmetrical. The problem with symmetry is that it's quite a lot of hard work to get it looking perfect however I have a couple of tricks for helping with this.
The materials you will need are:


Step 1. Cut out pieces of modroc/bandage. Cut around your little pattern pieces on the bandage, you need enough for three layers on each side of the face. Also chop up some strips and squares of various sizes.
Step 2. Apply vaseline generously to you or your 'victims' face. This is really important, especially over the eyebrows You must apply a layer to protect your skin or the plaster of paris will happily stick to it. Follow any other instructions on the packet of plaster bandage carefully. Lay down some newspaper and wear old clothes.
Step 3. Dip a piece of plaster bandage into a bowl of warm water to activate it and apply to the face. I started at the top - across the forehead and worked down. As you work think about how you are placing the strips, make sure they overlap and that everything is fusing together well. You need about 3 layers for a sturdy mask.
Step 4. Sit back and wait for the mask to dry. This doesn't take very long, about 30 mins. The mask tends to feel quite cold against the skin and you can gently wriggle your facial muscles to start loosening it from your face.
Step 5. Remove the mask from your face, again, let your facial muscles do the work, pull lots of faces and it should come away. I would advise leaving the mask overnight to ensure it can harden properly.
Pictures of the finished plaster of paris mask. After you have allowed it to dry overnight you can gently inspect it for any faults or crumbly bits. Any parts that are in danger of falling off can be reinforced with more plaster of paris bandage. Carefully wet the area of the mask that needs repair and apply bandage.
Part 2 coming soon!
The finished mask.
First you need to design your mask or at least have some rough idea of what its going to look like. The major decision is symmetrical or asymmetrical. The problem with symmetry is that it's quite a lot of hard work to get it looking perfect however I have a couple of tricks for helping with this.
The materials you will need are:
- Plaster of paris bandage or "Modroc" as it's sometimes called.
- Polyfilla or any type of acrylic repair putty.
- Sandpaper (course and fine)
- Sponge applicator, I chose to use an artists sponge brush but you could use any sort of sponge.
- Vaseline
- Acrylic paint - white plus whatever colours take your fancy
- Plaster/putty knife
- Paint brush
Step 1. Cut out pieces of modroc/bandage. Cut around your little pattern pieces on the bandage, you need enough for three layers on each side of the face. Also chop up some strips and squares of various sizes.
Step 2. Apply vaseline generously to you or your 'victims' face. This is really important, especially over the eyebrows You must apply a layer to protect your skin or the plaster of paris will happily stick to it. Follow any other instructions on the packet of plaster bandage carefully. Lay down some newspaper and wear old clothes.
Step 3. Dip a piece of plaster bandage into a bowl of warm water to activate it and apply to the face. I started at the top - across the forehead and worked down. As you work think about how you are placing the strips, make sure they overlap and that everything is fusing together well. You need about 3 layers for a sturdy mask.
Step 4. Sit back and wait for the mask to dry. This doesn't take very long, about 30 mins. The mask tends to feel quite cold against the skin and you can gently wriggle your facial muscles to start loosening it from your face.
Step 5. Remove the mask from your face, again, let your facial muscles do the work, pull lots of faces and it should come away. I would advise leaving the mask overnight to ensure it can harden properly.
Pictures of the finished plaster of paris mask. After you have allowed it to dry overnight you can gently inspect it for any faults or crumbly bits. Any parts that are in danger of falling off can be reinforced with more plaster of paris bandage. Carefully wet the area of the mask that needs repair and apply bandage.
Part 2 coming soon!
Labels:
How-to,
Mask,
Mask-making,
Plaster of paris,
Tutorial,
Venetian mask
Subscribe to:
Posts (Atom)