Showing posts with label pink. Show all posts

Wednesday, 23 May 2012

Finished Project: Dusky Pink Gown

Recently I was invited to a murder mystery evening which was so much fun.  A few weeks before we were given a costume brief and mine was to be a socialite who should wear a full ballgown.  I couldn't find anything in the local charity shops so naturally came to the conclusion that two weeks is plenty of time to design and make a gown from scratch!!!


Luckily I had this fabric in my stash, it's lovely pink chiffon and I used black satin that I had lurking around for the underdress/lining.


I just about got the thing sewn in time and then realised I had just enough fabric left over to make a sash to tie around the waist.  It's funny how last minute ideas like that can really complete a project in a way that surprises you.


These photos were taken the day after the murder mystery, when the British weather decided to behave itself  for once and the blossoms were at their prettiest.  Good timing all round!!

Saturday, 25 February 2012

Finished Project: Pink and Silver Butterfly Corset

The most fatal thought when sewing must surely be "the hard parts done, the rest should be plain sailing........".  followed shortly by "D'oh!".  Maybe it's just me but if dare to think that a project is going really well, it's like asking for trouble.

It turns out that sewing delicate filigree wire with fairly delicate silver thread onto the surface of fabric which has steel boning in it is not 'plain sailing'...but I got there in the end.


View of the front-ish.


View of the back-ish.


And a close-up!

Saturday, 18 February 2012

New Project: Pink and Silver Butterfly Corset

As part of my ongoing quest to improve my corsetry skills, my latest mission has been to draft a pattern for a simple six panelled overbust corset from my basic dress block.  I did a quick toile to make sure there were not any glaring errors and then moved onto phase two which involved some pretty pink fabric from my stash....


The perils of flash photography - it's a little bit shinier than in reality!

I thought it would be fun to incorporate my printing technique from my last corset (the Pre-raphaelite underbust) as well as some wire applique.


My method for bringing the design together across the front was a bit precarious to say the least.  I positioned my wire filigree and took loads of photos to document their position on the corset.  Then I had to carefully maneuver the corset around whilst applying the butterfly print.


Once the butterflies were set I could then place and sew each piece of filigree wire down.  A bit of a fiddly job but it was worth it and I will show you the results in my next post.

Saturday, 15 October 2011

Finished Project: Pink Oriental Handbag

Ages ago I started making a handbag but you know how it is when you get a big shiney idea in your head.  I went off on a tangent and left my unfinished handbag shoved in a corner.  So when my current handbag decided to completely fall apart at the seams I liberated the poor thing from under a pile of other unfinished bits and bobs.


I was going for a slightly oriental look with the beading in the shape of blossom branch and added organza blossoms to finish it off.


A close up of the beading work.

The whole thing is made from recycled fabrics including curtains and an industrial chair foam to give it shape.  Finished just in time for a friends wedding!

Wednesday, 4 May 2011

Finished project - pink 18th Century stays.

The stays are all done and poor old Claudia was promptly dragged out into the garden and crammed into them.  Actually, I didn't think she'd fit at all because she is so 'un-squishy' but they laced up really well around her.


 All of the boning channels and seams are sewn by machine, the bias binding to finish off all the raw edges was done by hand.


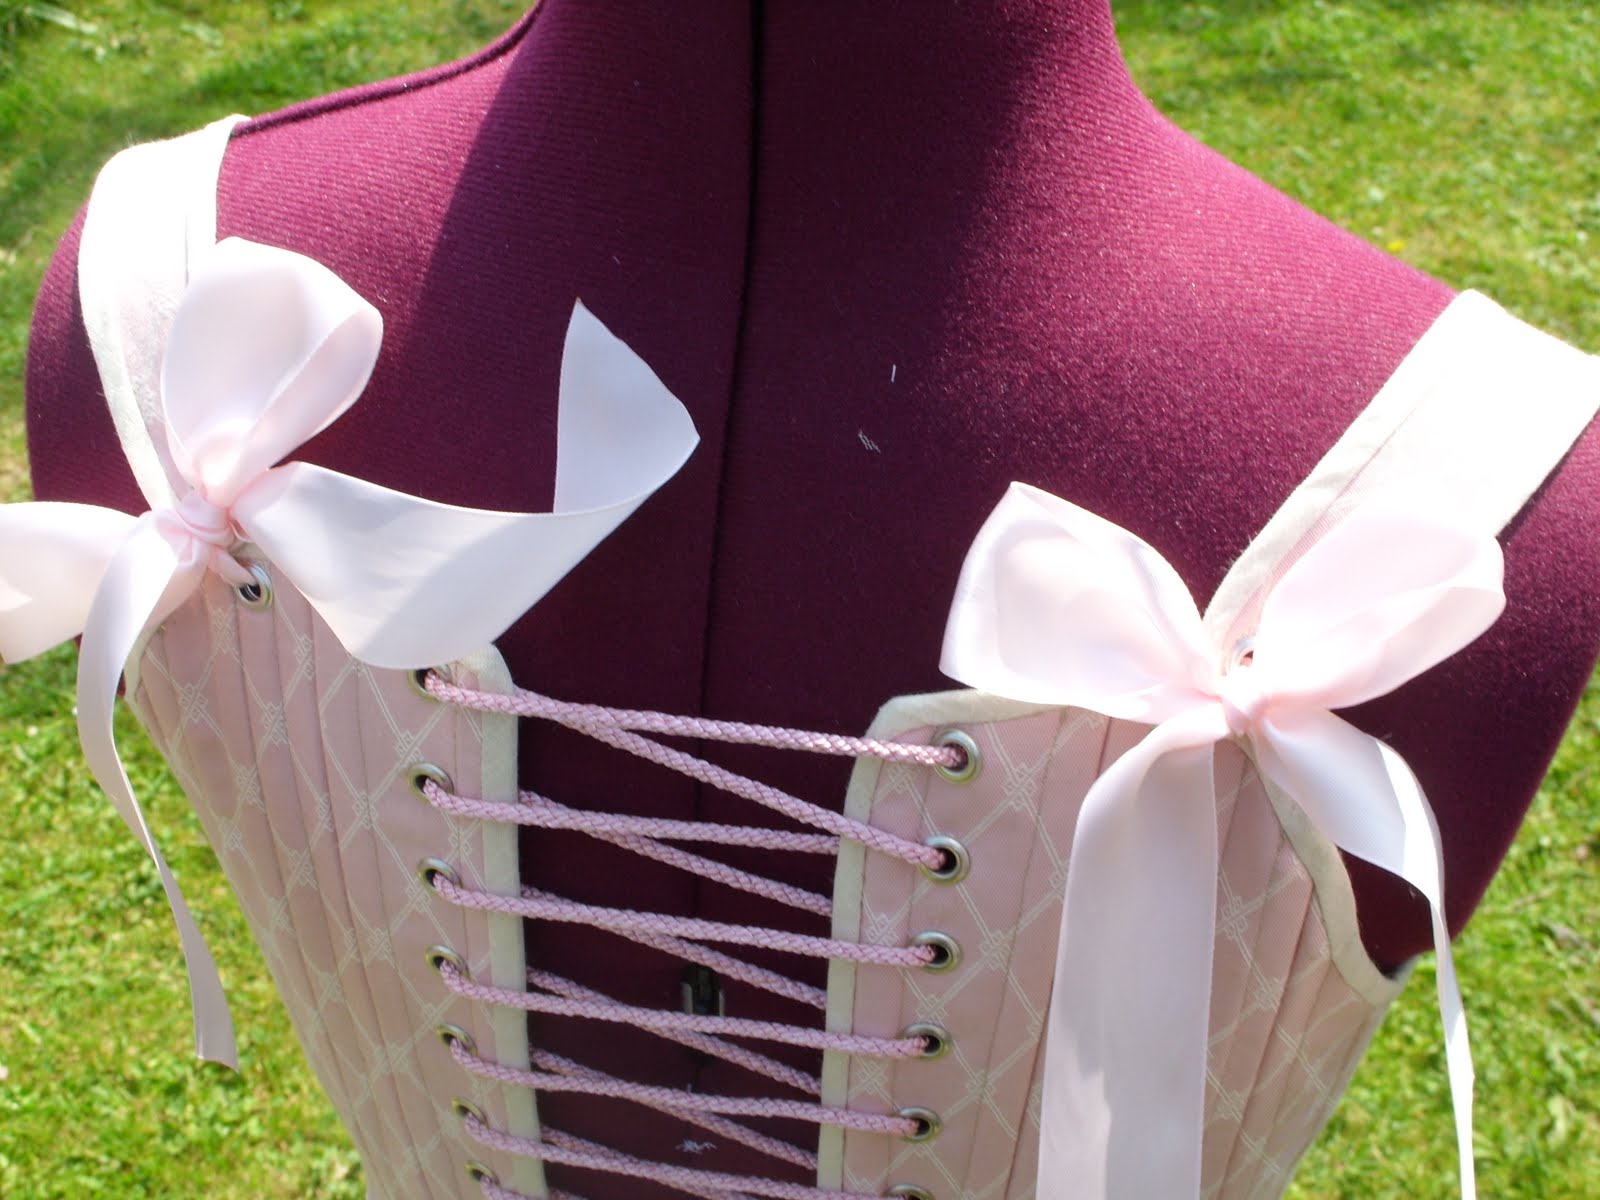
The stays from the back - I used metal eyelets.


The straps tie together at the back with ribbons throught the eyelets.


These were so fun to make, so much fun in fact that I'm already embarking on another set of stays.  This time I'm going for a richer colour palette with front and back lacing.

Friday, 22 April 2011

18th Century stays - in progress.

I have started a new project - a set of half boned stays.  I was so engrossed in the sewing of them that I forgot to take photos until I had finished most of the boning. I used the 1780 pattern from 'Corsets and Crinolines' by Norah Waugh which is a bit of a headache to scale up as it's not on a grid on the page.  Once I had my paper pattern I cut out a calico toile just to check the fit. 


This is one half of the stays in my yummy pastel pink fabric.  I confess - its curtain fabric and the lining is a dusky pink chintz. Furnishing fabric shops are my new obsession.  I guess it's because the patterns and colours are better suited to historical fashion, plus they are nice and strong - ideal for stays. I am using cable ties for the bones - a fabulous tip I picked up from American Duchess.  Rather irritatingly, I bought a bunch of 36 thinking it would be plenty and I was 3 short....grrrrrrrr!!!


All the panels are sewn together.


The inside of the stays.  From here I need to find or make some delicious bias binding to finish all the edges and whack in some eyelets.